My livestreaming setup
I've been asked more then a few times to show my livestreaming setup as well as what I use to broadcast. So here you go!
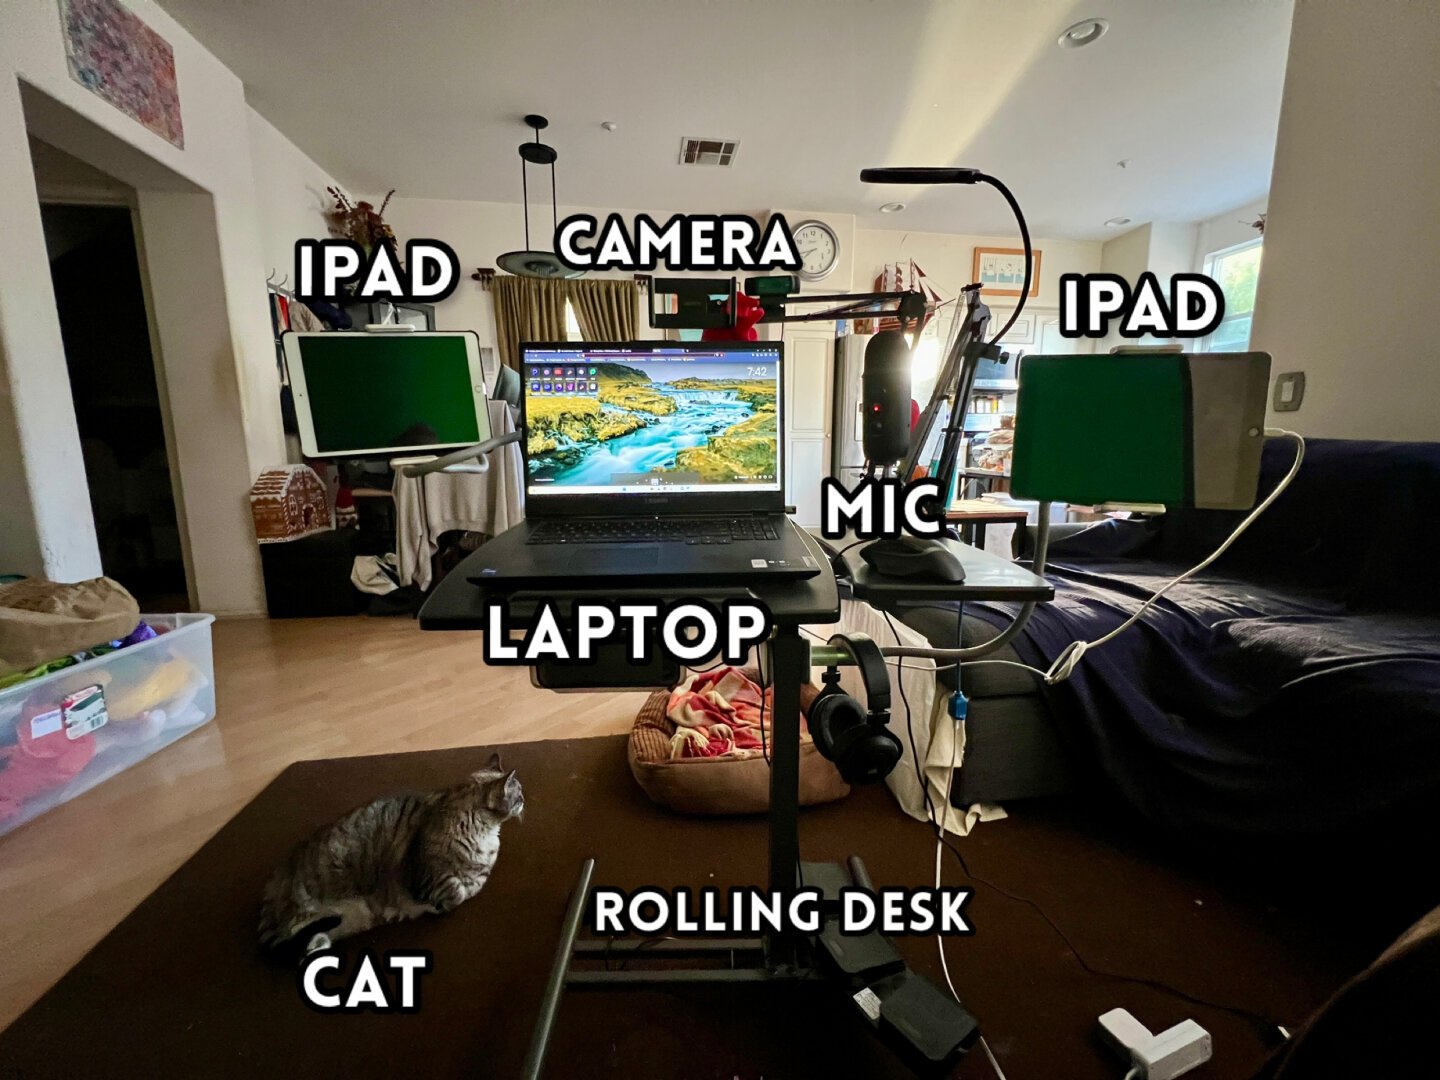 Because of lack of space I use a rolling desk as a studio. I use a green screen behind my chair and a light behind the desk. (both not shown) The desk is as shown with 2 ipads, a laptop, a Blue Yeti mic, and a camera (not shown because I use my iPhone as my camera and used it to take these pics.
 I use 4 arms to hold everything up. The iPad arms are both bendable and very sturdy. The mic and camera arms are adjustable and lock at the joints for extra strength.
The software I use to livestream I've only been using a few months. Before I used OBS with a bunch of plugins. Now I use Evmux because it streamlines everything I was trying to do with OBS, namely bringing guests on, using transitions, multi-streaming, and switching scenes with my iPad using Touch Portal . The biggest difference between OBS and Evmux is that Evmux runs everything from my browser (must be a Chrome browser) so there's no extra software to run making it easier on my laptop. It's not as robust and I don't have as much control as I do with OBS, but for my needs, Evmux is perfect.
Evmux is free with a watermark but I use the Basic paid package. I suggest checking it out if you want to easily bring in guests, monitor multiple chats in one spot, highlight individual comments in the chat by showing them on screen, switch scenes using hotkeys, and of course, multi-streaming. To use stream alerts you'll need the Pro package, but I find them mostly distracting for what I do, so it's not a big deal for me.
I multi stream to YouTube, Twitch, and PeerTube. Since PeerTube is the least well known, I'll explain what it is and how to stream to it.
PeerTube is a video platform much like YouTube that is part of “The Fediverse”, a group of federated, decentralized services that are able to share info between them using the ActivityPub protocol. This means that if you use a service like Mastodon, you'll be able to follow someone on PeerTube and be notified when new content is created.
Before selecting a PeerTube instance (an “instance” is a public or private server running the PeerTube software) it's important to select an instance that uses a chat plugin with it's livestreaming. Currently PeerTube has no native chat for the livestream, but it's being worked on and is said to have an early 2024 release planned.
Once you've joined an instance, connecting it to Evmux is easy. Just click on “Publish” in the upper right corner. This will take you to a page where you can either upload a file, import a file from a url, or go live. It's the “Go live” that you'll want to click on. Once you do you'll be presented with choosing the channel that you want to put it in, the privacy level, and a choice between a Normal live where you stream only once and the replay will replace your live, or a permanent/recurring live where you stream multiple times and replays will be separate videos. I use the permanent/recurring.
Once you've chosen which type of live you want, you'll be shown your stream info which you'll enter into OBS or Evmux or whatever you are using. At that point, you're set to go. If you're using Evmux you wont see the chat like you do YouTube and Twitch in the dashboard. To compensate, I split my iPad screen and use half to monitor the PeerTube chat and the other half to use Touch-Portal.
And that's my setup. It took me a few years to put this all together. I find the hardware works great for small spaces and Evmux works great for my needs. If you have any questions, feel free to ask them on Mastodon where you can find me at @[email protected]